Monday, August 18, 2008

I get by with a little help from my friends.....

Well, the windshield is out!! It was hard work and took a while but that bugger is out! The new one should be dropped in tomorrow by a pro.


After a failed attempt to remove the windshield, my buddy, (we'll call him Rusty), vowed to come back the next day and that the windshield would be out; he is a man of his word ;) You know you have great friends when they stick with you for this kind of crap work.


Here is a series of photos:


Below: At this point we were worried that we were going to have to kick the glass out; luckily, we didn't have to.


Below: For a while, we used a wire and tried to cut it out like cheese or clay but it only moderately worked. We ended up getting it out with a fine cutting wood saw, this worked the best when you get one guy to lift the already cut part while the other guy contiues to cut.


Below: The power of the mighty saw was the best method.


Above: Rusty letting off some steam!! He put that windshield in it's place.....or I guess he took it out of it's place ;)

Below: Cleaning up the body around the seal......didn't take too long.


Above: Two very happy boys!! Victory is ours!!


Below: Fixed and painted............drying and then ready for glass. I actually had the glass dropped in today and it looks great. Pics to come........


Below: The grille conversion is now underway. Here is the basic idea:


step one: cut out the area needed for the headlight and it's adjustment screws......................................cont..


Below: Step two: bracket it in place where it aligns with the the headlight housing piece and then cover the open areas with fibre glass so that water does not get in to places that it should not be. Note: In this picture, I do not have the brackets in place at all.....I am just holding it for a visual.


Below: Here is another friend, we'll call her "Lady", who has given me so much help with this project. Here she is cleaning out the rubber gasket for the windshield; I am amazed at how clean she got it. She is responsible for many areas in the van where I would have rushed through; she took the time and did a quality job!!! Hats off.


Overhead visors and down spoilers are being cleaned and painted..........

Grilles are being taped and sprayed in the right spots...................

Hoods are being cleaned and painted.......hood pins to be installed.....

Chrome rims and being polished and oh my god do they ever get shiny!!

More coming soon,

Keep on Truckn!!!!!

:)

PS: The expanding foam was a failure.....though it worked on my first van, this time I bondod and primed and thought I was done but it continued to expand and cracked.....boo! Rework sucks but must be done.


Thursday, August 14, 2008

Let's get Physical..........Let me hear your body talk.

Project Chevy Van facelift is very much happening. It's been many a long days but it is really getting there. I am not a pro and I have very limited time but I think she' s coming along nicely. Basically, I've been grinding and cutting and removing all of my rust away. After the rust is gone, I spray tons of 'rust converter' and then I prime......sanding in between all of that as well. I'm hoping that this will add a bunch more years to my van.

I've been lucky enough to have three specific awesome friends who understand that I am in need as I have to finish the body before moving towards the end of August. They have come out and have lent me a hand and I love them dearly :* (This probably wouldn't have been finished in time had they not helped me out, so le't hear it for friends!!).

Here are some pics!!


above: My friend working away, removing rust.


above: although I am going to use the $50 paint job technique using a roller, I've sprayed the matching color behind the bumper before putting the new one on. It's much easier to spray the cracks and tight areas now.
That chrome bumper is the one that I salvaged from my black '81 van before having it towed away.


above: The bumper is on with only two bolts for the moment. I'm hoping that when the others are in, the whole thing will straighten itself out.


above: A small dent......can't really be seen unless you get down on your knees so I'll let it go; again, time is of the essence here.


above: This back corner was rotted out pretty badly; I cut a lot away. A while ago, I bought a primed hood from a guy and low and behold, he even had a replacement piece for this very corner. The replacement panel was for a full size van and not a stubby but I cut and trimmed it and bondo'd the crack. I used a rivet gun to attach it..........I am not a pro and I really don't mind the rivets being visible so this is the finished product.


above: Here's what my weekend has in store.....the windshield is coming out and the overhead visor is temporarily coming off to get to these repairs. I have a much newer winshield with no cracks that I picked up for $50 around X-Mas time.
I've been collecting everything I need to build my van, hoods, windshields, taillight covers, old shcool grilles, radical headlights. All I need now are flares or those chrome trim pieces around the wheel wells that the conversion vans have...........anyone know where to get them?
Let me know, please :)


above: A bad spot to be repaired this weekend.


above: I bet you're wondering what the heck this crap is!?!? This is how I repaired this section on my first van. This is the bottom side of the van on the driver's side between the driver's door and the back tire; This spot always rusts out. I cut and remove a big strip here because it makes it easier to have access to clean out what lies behind. After cutting and grinding and cleaning and rust converting, I duct tape these sections and then fill it with expanding foam and then cover the holes so that the whole area is covered. Leave this to dry over night and by the next day, it should be dry. Make sure to put paper behind the duct tape where it doesn't stick to the van. Once you remove the tape, the foam will have expanded and all you have to do it shave the foam back and then fill it with body filler. The foam has little bubble holes so the bondo gets in to those holes and sticks well. Now you just have to fill it in and sand it smooth. I'm not going to bother putting in the lip on the underside, it's way easier to skip it and most people won't even notice. I have no plans for running boards ever anyways.


above: My neighbours thought that I was crazy the first time I did this and my current neighbours feel the same way. :p

Note all of that rusty crap that came out from inside and behind the cutaway section. This is a great way to clean that spot out.

I'm telling ya; this works and saves a lot of time and sanding. ;)


above: I forgot to flip this image so rotate it once clockwise and you are looking at the front of my van as it looks right now with the hood open. I had some down time to kill so I began fitting the old shcool one piece chrome grille to the van. I had to remove over an inch from the nose of my '95. The hardest thing will be getting the lights to fit. The old grilled is set up for circular lights, which look so cool!! The circles that you see here for the headlights don't line up with the circles on the grille; so.............because I need to be able to adjust and aim my headlights, I am going to cut the headlight hole section right out on the van, align them and then re-attach them with a bracket or a sort. This will totally work and will be awesome, more on this later.


above and below: The guy who developed the $50 paint job technique used it on his charger and Beatle. These are the kinds of results that you can expect when done properly.


My Van, to be continued...............................


Tuesday, August 12, 2008

INSANE IN THE MEMBRANE!!!!

So long story short.....I am moving very soon and I was going to sell my van for a shortbox v6 conversion van but after going to see it......I felt much better about my van. I think that it was just what I needed to remind myself that my van is in pretty good shape and that I have put a lot in to it.  

So longer story even shorter.....I've got just less than two weeks to do the body and paint but I am determined. I've been putting in some long days and I've made a bunch of progress. I have finished almost the whole right side and some of the van and have started the grille conversion.  Everything is going well, some things take longer than I want and some things don't take long enough but hey, I have no time to be picky right now. I never said I was a body man......just a crafty person.

I've got plenty of empty cans of rust converter and primer and it looks like I've fried my angle grinder from removing an inch of metal off of the nose to fit the grille.  I still plan to use the $50 paint job method using 'tremclad medium blue'. I am pretty excited about it all !!!

Things to do:

-Remove  windshield and visor to do the body work......pay $80 to have my new one proffesionally installed.

-grind bolts away to remove the rear bumper to do the body. I already got the front one off. These will be replaced with the chrome bumpers off of my '81.

-The obstacle with the grille conversion is that the wholes for the headlights do not line up with the holes on the body. The solution is to cut out the headlight holes on the body; cut the whole thing out in a section and align it and then attach it with a custom bracket; this will work.

-small sections of body.

Wish me luck and keep me in our vannin' prayers!!  Pictures to come!!

:)


Sunday, May 25, 2008

Chevy Van Facelift part 1

Hi Folks,

Here's a quick video of my first step in the plan of attack. The thing about body work is the time that you have to put in to it!


Sorry that the quality is not that great but it's all I have for now.

So now is the time to prep. I have to clean the van and lay out all of the tools that I will need that I have. I figure I should make a list of materials that I will need and go out and get them as well. After those things are done I'll be clear to start on the body.


Stay tuned for more; I'll try to make the video quality better ;)


Sunday, May 4, 2008

Transportation Alterations.....


So for those who don't know, this is the summer that I plan to do the body and paint to the van. For this project I am dropping the insurance to fire and theft and parking the van. That way I can pull off the bumpers and really do a good job. I'm doing the paint job using the $50 paint job technique....if you don't know it, google it ;)
So I realized that with no van I still need a way to get around. I have to go to work five days a week plus I still plan to go busking at the market with my didge and drums. How do I transport all of my stuff? I still need to be able to get cat litter, tubs of ice cream for sundaes, pales of body filler....you know the basics ;)
A friend of mine at work recently bought an electric bicycle. The thing looks more like a scooter than a bike but it's legally classified as a bicycle. I did some searching and ended up ordering an electric bike conversion kit. I decided that I need one of these things because I will be hauling my busking gear plus doing the usual errands that life demands. To keep my energy level up and to keep things fairly reasonable I need some electric help.  With gas prices rising and insurance dropped my kit will pay for itself.
So long story short, I set out to find an aluminum framed cruiser bicycle....I found one used on kijiji.ca .  I love kijiji.ca !!!!!!!
I got a schwinn 5speed aluminum framed bike used but almost new for $125 and I love it. It was actually the Tim Horton's 40th anniversary roll up the rim to win bike. 
Here's a pic:

So I just got word that my electric kit has been shipped so it should show up this week, hope, hope.  I decided to paint the bike before I put the kit on it and having taken friday off from work, well, it presented the best time to jump right in to this project.

Ok, Here's the plan:  how to get a glittery metallic look on a budget.

1. Paint the bike with tremclad

2. sprinkle it with lots of glitter, let it dry

3. spray it with varathane a couple times

4.cover the whole thing with spar varathane.  

This has been a technique on my mind for a while and this was the best time to try it out. 


Did it work? Well you be the judge........


Here are some pictures of the process:


The bike
Classic red  paint.....radio flyer style.......time for a change!!
The tools, (minus the spar varathane)
Four more tubes of sparkle was needed to finish the job.
The test subject: the chain guard.
The completed chain guard.
Close up of the chain guard, looks good!!

Another close up shot of the back of the bike.


Chain guard installed


Finished , very happy with the result.

Bling! Bling!


Schwinn!!


Well, all in all I'm super happy how it turned out. I'm still building up thin coats of spar just to add a good strong protective layer to last for many years. 

I'll post the features of this bike later on this week as well as some pictures. Maybe I'll add a youtube video of the bike and it's glow lights and it's on board sound system!! 

Once I get my E-kit I will be set up and then it will be back to project van.

Until next time.

Cue the outro music.............

:)


Thursday, January 17, 2008

!!!Pictures!!!

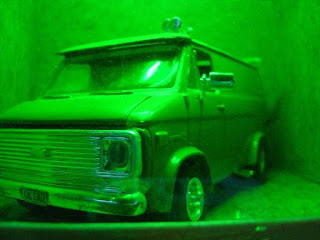
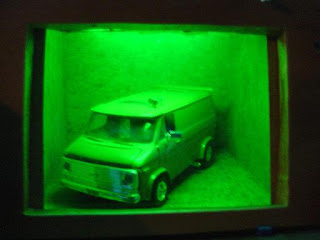
I was heading to the van to take some pictures for a friend so I took some extra snaps of the model. I originally wired a green light in there with it but never got the picture for it after dark....so here it is.


and another..........


~~~~~~


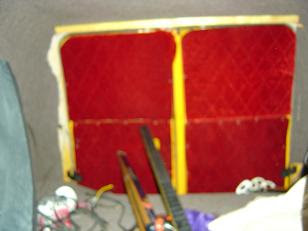
Here's a shot of the back doors...mind the skis. I may put more woodtrim half way up the doors.


~~~


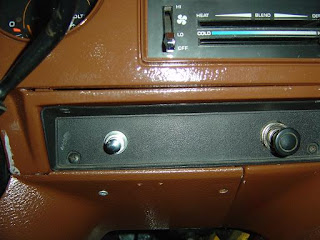
A while ago, my ignition switch quit. I had all my power but no crank. The switch itself is on the top of the steering column.......*sigh*.......that's not an easy spot to get to. I read my manual and started to go for it but then decided against it and to go with plan b. Plan B worked great. I wired a push button ignition, (looks the same as the horn button), straight to the starter, bypassing the ignition switch. All the safety is still there as you must insert the key in to the key ignition and thurn it to 'run' and this also unlocks the colums.....then push the button which cranks. I'm thrilled about it because once again...this is old school, (push button start on dash), meets new school, (steering column lock/anti-theft).


I also re-located the 12 volt cig. lighter as it was taken out with the engine hub cover piece. It's now placed just further down from the starting button.


Here's a picture.........


~~~~

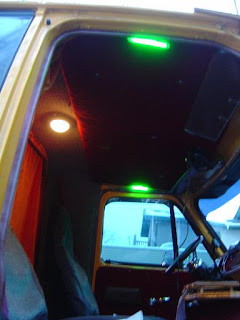
Here are the new green lights I put last weekend............


They add a nice mood in combination with the dome light.


~~~
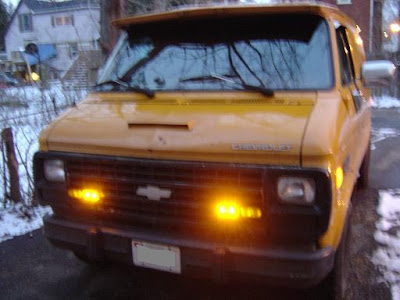
And here are the LED parking lights...they look much brighter in this picture....


I can't wait for the new headlights and front end!!!!!!!!!


~~

Here are my new tail light covers, freshly won off ebay......been looking for these babies for a while ;) Never thought I'd score them so cheap, ($17!!!!!!!)(yes!!!)


~~

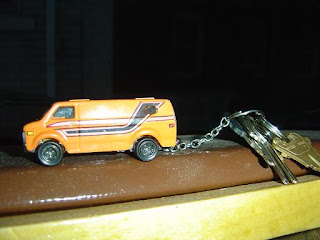
And here is my still kind of new keychain, also from ebay....$5 It's actually a dinky car, probably from the dollar store, with a screw i hook in the back but it's a full circle instead of a hook...I guess a 'loop'. That's a good idea.......someone I know should do this and sell them on his website with his URL on the side of the van ;)


~~~

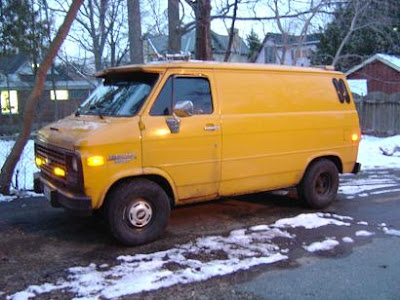
And finally, here's the van in full on winter mode....even though most of the snow is melted away, boo......If it's going to be winter and I can't do body work...at least let it snow so I can cross country ski and enjoy it.....*sigh*


Winter mode = winter tires and rims, 12 volt heater (only comes out for winter), dirty, dirty sides....just can't keep it clean in the winter...but hey, at least she's undercoated.


That's it for this instalment.....Keep it real


*cue the phat music*


Tuesday, January 15, 2008

The Winter Blues.....

Well, there's not too much to report on. The van is currently in winter mode with it's winter rims and tires. She's been running great other than a strange smoke stream that came from the toggle switch for the heater followed by a burning plastic smell followed by the heater quiting except for when it's set on high.....or as it is written, 'HI'. I'm not too worried about it; I have a 12volt heater. "HI" works so my windshield will remain clear and that's all that matters.


I think I've settled on a color for the van.....


"DUN --da da da!!" (drum roll) "trtrtrtrtrtrtrtrtrtrtrtrtrtrtrtrtrtrtrtrt"


Superman blue is what I'm calling it...but it's listed as "Ford blue" so "Superman blue" it is!!


I'm pretty pumped about it......I can just picture the blue with the all chrome old school grille, the amber LED parking and signal lights and the all chrome bumpers and rims.....sigh...if only it was warm enough to start the body work.......I'd be all over it. Of course, this means that I need to remove the mini me and re-paint it.....it's a labour of love ;)


I got esepecially exited when I found the picture (below) on line. It shows what my headlights will look like when you turn on the outer bulb of the headlight......super sexy!!


Now combine that with the LED's and the chrome grille and you got yourself a good lookn' front end ;)


I also scored a new windshield with a factory tinted upper first 6"...if that makes sense to you, congratulations!


Seeing how I need to pull the old winshield out to do some body work around the seal, (that old goose ;) ) , I may as well drop in a better one and get rid of the one with two cracks and scratches. Oh yeah, and I got it from a really nice guy for $50! Which is great because it's probably all that I'm willing to spend ;)


I now have a CB radio and a nice tall arial on top of the van...between two yard sales it only cost me $17 .........man, I love a bargain!! I think that's half the fun of all of this ;) The radio will be installed directly underneath the mini me model....where you currently see the piece of wood.


I also installed two 4" green tube lights up front right above the doors. I wired them in to the dome light/interior lights.....they add a little mood lighting for whatever mood that you may be in....Happy, sad, angry or just green. I have two more that I will locate in the back somewhere. I actually did them by fluke while I was waiting for 'captain underpants', (if you know me, you know who I mean), at the doctor. I had the lights under a back seat, my tool kit with a philips and that was it. 20-30 mins. later, they were up and running. Just to add, they only costed me $3 each, cheap!!


I've disconnected my amp and I plan on pulling it out. It has a buzz, I can hear the engine acceleration through the speakers that it powers.....never had this happen before.........but I really don't care to fix it. The 'loud' feature on my deck and the mids and hi's with filters sound great to me plus there is a lot less drain on the battery and less work for the alternator to do. I'll save the power for the underlights ;)


One of my X-mas gifts was a stainless steel travel mug; this is great as plastic causes cancer...don't believe me? Number 5 plastic.......it's everywhere......it's even lining your cans of pop....it has been found in cancer. But really, does it take a genius to figure out that plastic and heat don't mix? What does your common sense tell you? Mine says, "Holy Crap, let's avoid plastics wherever possible!!" Anywho, I'm off topic here................the coolest feature of this mug is that it has a base that you can screw the mug in to. I'm thinking that I may screw the base down to the left side of my drink tray and then screw my mug in to it.....no more securing my mug with my hand while I take turns.


Get a load of the new no window Chevrolet HHR (below)


Looks like a modern panel van. You could probably even put some custom port holes in those back corners ;) I'll stick to my van ;)

That's about it for this edition of "Pimp my Chevy Van"!!! Cue the music....."Zoom!! Zaga!! Weh Wah" phat drum beat.................................."Zoom!! Zaga!! Weh! Wah!!! Phat drum beat........repeat and fade out.....

PS: Be sure to check out the newest website http://www.mychevyvan.com/